A SOCKS proxy is an SSH tunnel down which specific applications forward their traffic to the server, and then on the server end, the proxy forwards the traffic out to the general Internet. Unlike a VPN, a SOCKS proxy has to be configured on an app by app basis on the client machine, but can be set up without any special client agents. A SOCKS proxy can usually be used even when a VPN client is misbehaving or being blocked.
Prerequisites
- A web browser (instructions can be found below for Firefox, Chrome and MS Edge, feel free to send Safari insructions if you get it to work).
- PuTTY (required to set up the proxy tunnel for Windows users. Users of Mac OS X or Linux have the tools to set up the tunnel pre-installed).
Step 1 (Mac OS X/Linux) — Setting Up the Tunnel
On your local computer, create an SSH key. If you already have an SSH key, you can use that one. (It’s good practice to give your SSH key a passphrase, without it anyone with access to your laptop can “be” you on QM hardware).
Open a terminal program on your computer. On Mac OS X, this is Terminal in Applications > Utilities.
Set up the tunnel with this command:
ssh -D 1337 -C -q -N eecsusername@jp-login1.eecs.qmul.ac.uk
Explanation of arguments
-D: Tells SSH that we want a SOCKS tunnel on the specified port number (you can choose a number between 1025-65536)-C: Compresses the data before sending it-q: Uses quiet mode-N: Tells SSH that no command will be sent once the tunnel is up
Be sure to replace eecsusername with your own sudo username. If jp-login1 is unavailable you casn use the (busier) frank.eecs.qmul.ac.uk server
Once you enter the command, you’ll immediately be brought to the command prompt again with no sign of success or failure; that’s normal.
Verify that the tunnel is up and running with this command:
- ps aux | grep ssh
You should see a line in the output like:
eecsusername 4345 0.0 0.0 2462228 452 ?? Ss 6:43AM 0:00.00 ssh -D 8123 -f -C -q -N eecsusername@jp-login1.eecs.qmul.ac.uk
Note: If you want to terminate the tunnel you’ll just need to close down the terminal application you launched for ssh (or kill %1 if you’re feeling brave. Don’t forget to re-set the proxy config in your browser if you terminate the tunnel.
Step 1 (Windows) — Setting Up the Tunnel
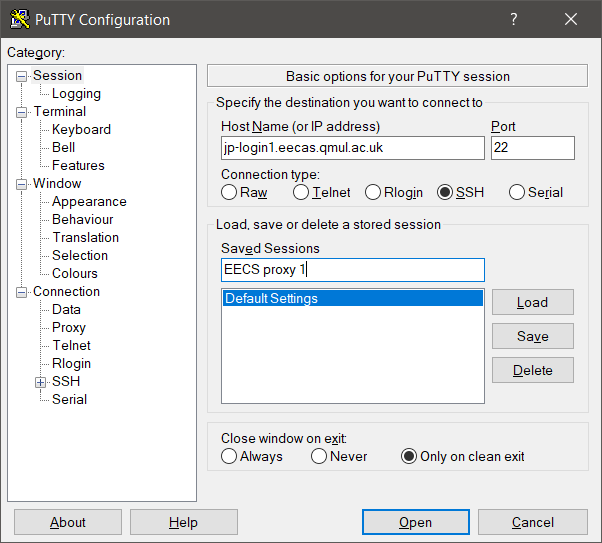
Open PuTTY.
If you haven’t installed it yet, download PuTTY and save it where you like. PuTTY doesn’t require admin rights to install; just download the .exe and run it.
Complete the following steps to set up the tunnel:
- From the Session section, add the Host Name of your server, jp-login1.eecs.qmul.ac.uk or the busier frank.eecs.qmul.ac.uk, and the SSH Port (in both cases this is 22)
- On the left, navigate to: Connection > SSH > Tunnels
- Enter any Source port number between 1025-65536. In this example I’ve used port 1337

- Select the Dynamic radio button
- Click the Add button
- Go back to Session on the left
- Add a name under Saved Sessions and click the Save button
- Now click the Open button to make the connection
- Enter your username and password to log in
You can minimize the PuTTY window now, but don’t close it. Your SSH connection should be open.
Tip: You can save your username and SSH key for this same session by following the PuTTY SSH Key instructions. Then you won’t have to enter your username and password every time you open the connection.
Step 2 – Configuring your browser to Use the Tunnel
Now that you have an SSH tunnel, it’s time to configure your browser to use that tunnel. Remember that for a SOCKS 5 tunnel to work, you have to use a local application that can take advantage of the tunnel;
Step 2.1 – Firefox
This step is the same for Windows, Mac OS X, and Linux.
Make sure you have the port number that you used in your SSH command or in PuTTY noted for this example. We used 1337 in the both the OS X / Linux example, and in the Windows example, you may have used a different port.
(The following steps were performed with Firefox Quantum 61.1 but should work on other versions, though the locations of the options may be different.)
- In the upper right hand corner, click on the “menu” icon to access Firefox’s menu:
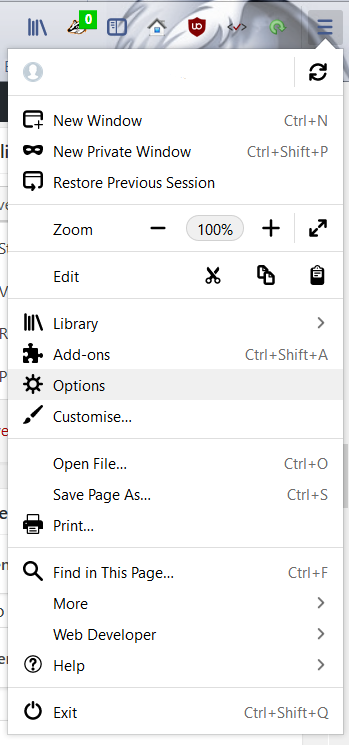
- Click on the Preferences or Options icon
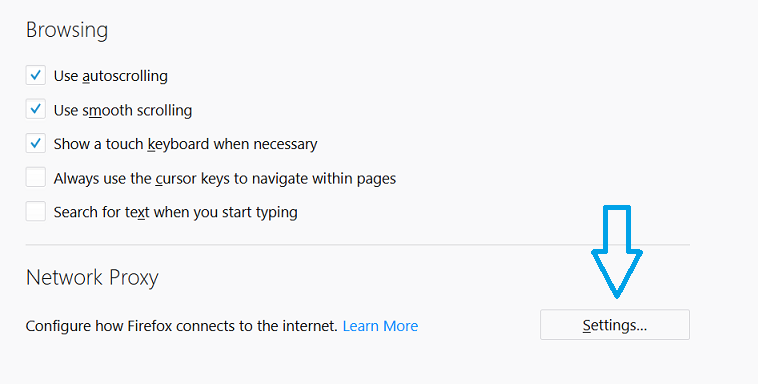
- Navigate all the way down to the bottom of the options list to the Network Proxy section and click Settings
- Select the radio button for Manual proxy configuration:
- Enter localhost for the SOCKS Host
- Enter the same Port number from your SSH connection; in the image you can see we have entered 1337 to match the Windows instructions.
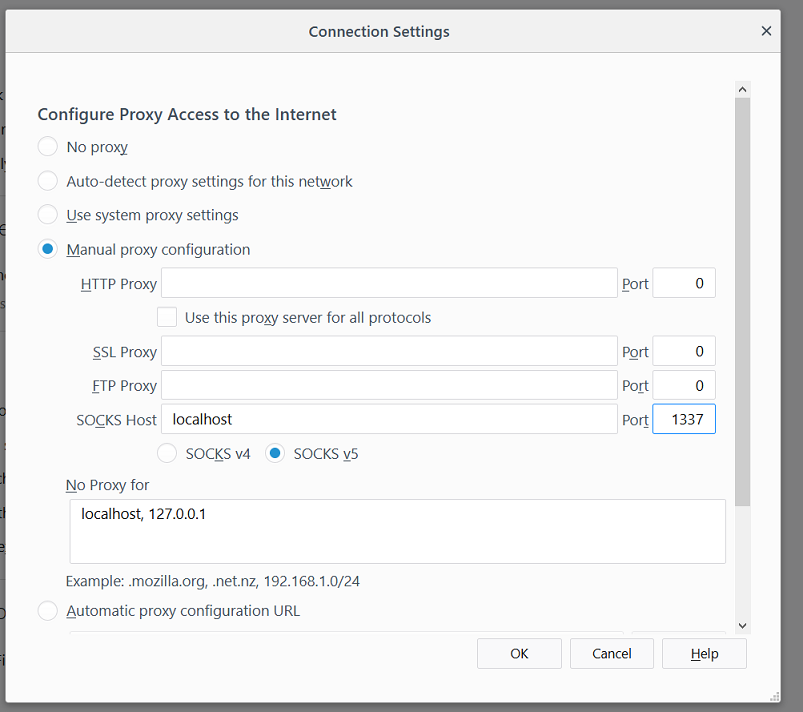
- Click the OK button to save and close your configuration
Now, open another tab in Firefox and start browsing the web! You should be all set for secure browsing through your SSH tunnel. Don’t foget, you’ll need to disable the proxy (tick the “No Proxy” option above) when you’re done and you’ve closed the SSH session.
Step 2.2- Google Chrome
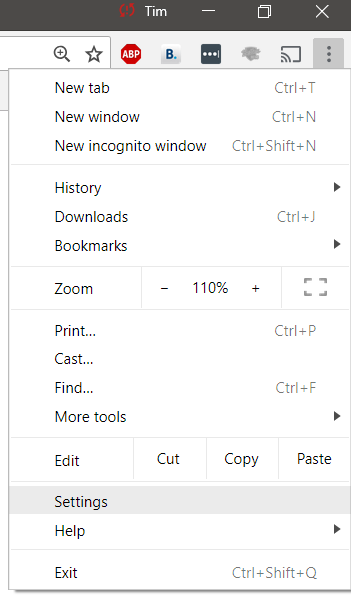
- In the upper right hand corner, click on the “menu” icon to access Chrome’s menu:
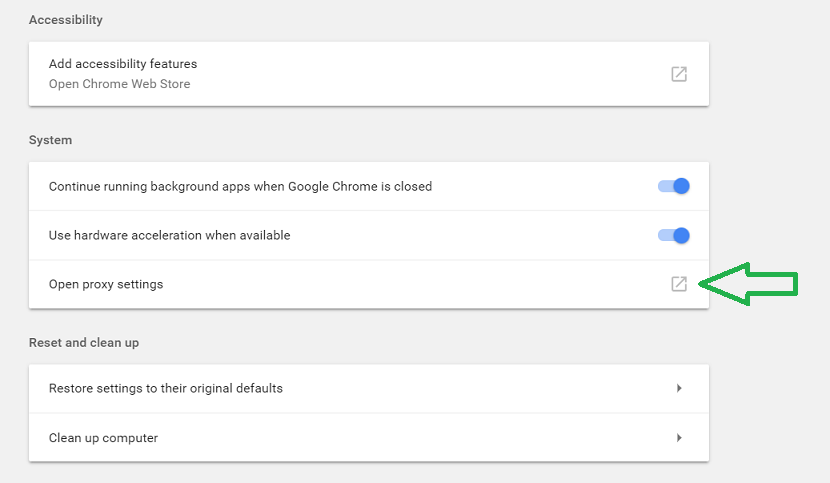
- Scroll to the bottom of the Settings page and click on the Advanced expander at the bottom
- Scroll to near the bottom of that page and select the Open proxy settings expander in the System section.
- Click LAN Settings in the resulting pop-up box and, from within the next box ensure that:
- The Automatically detect settings tickbox is not selected
- The Use a proxy server for your LAN…. tickbox is selected
- The proxy address is set to localhost and port is set to the same port number from your SSH connection; in the image you can see we have entered 1337 to match the Windows instructions.
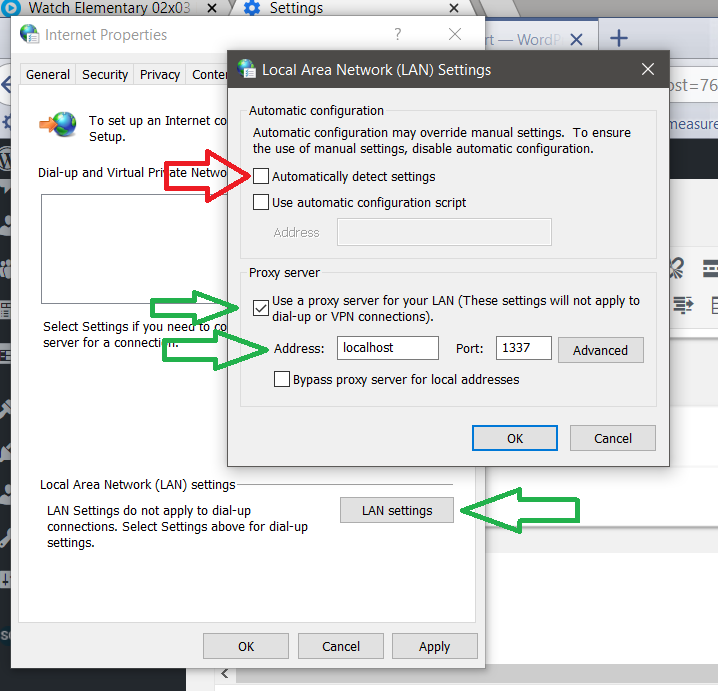
- Click the OK button and, when the top Window has closed, the Apply button and the OK buttons in the parent.
Now, open another tab in Chrome and start browsing the web! You should be all set for secure browsing through your SSH tunnel. Don’t foget, you’ll need to disable the proxy (untick the “Use a proxy server” option above) when you’re done and you’ve closed the SSH session.