Table of Contents
ATTENTION: PLEASE MAKE SURE YOUR PRIVATE KEYS ARE ENCRYPTED
follow this link to find for information to secure your keys, if you haven’t done so already, otherwise please read on, this guide will show you how to do that.
—————————————————————
Access to EECS Compute Servers is achieved with SSH-key authentication (known as passwordless authentication). Password-based access is not allowed, for security purposes, on the EECS compute servers.
Only the login-servers allow access using both the EECS password and SSH-key authentication.
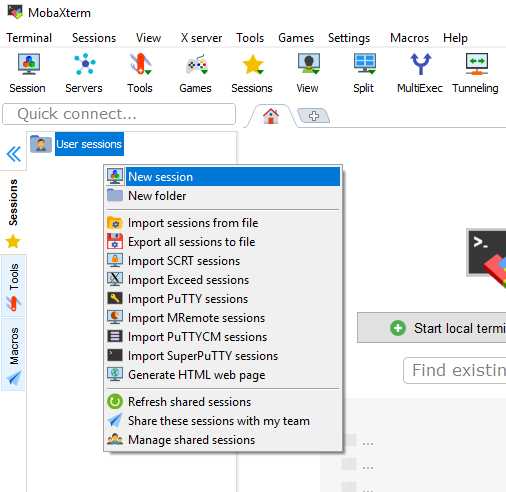
SSH Keys
You will need to generate your SSH-key pair:
- A Private key, which will be located in your personal device and will be used for SSH connections.
- A Public key, which will be located on the remote server, in the
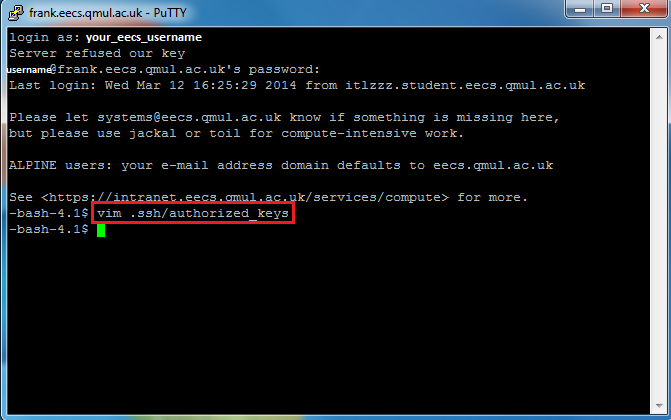
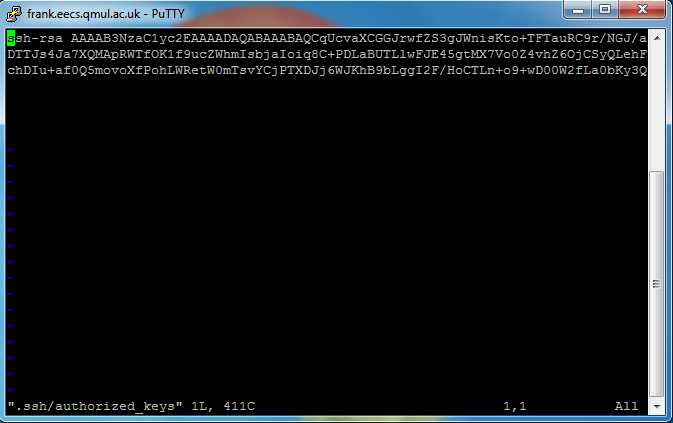
~/.ssh/authorized_keysfile. The public keys included in that file will be checked against the private key you are using to connect to the server.
From any Managed Desktop you can ssh into computer servers directly, given that you have setup your SSH keys according to the instructions as detailed bellow.
From self-managed devices or from outside the University, you have to log into the login-server and then ‘hop’ onto the compute servers. It is important to forward your SSH key in this case, so make sure that your SSH agent is forwarding from your personal device.
In the following step, you will generate the private-public key pair and copy the public key to the remote server. Select your OS from the tabs to show the guide:
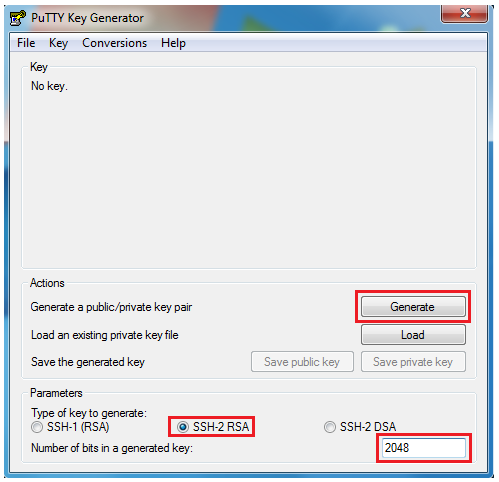
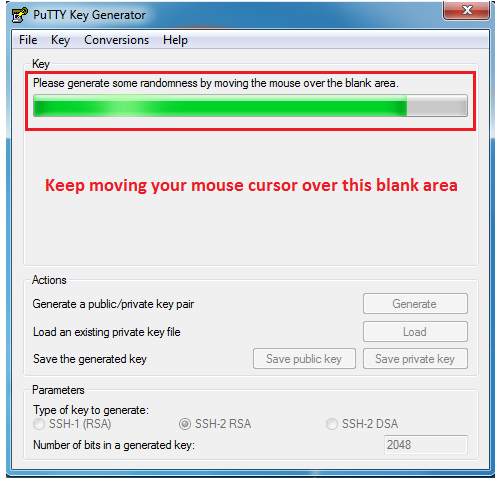
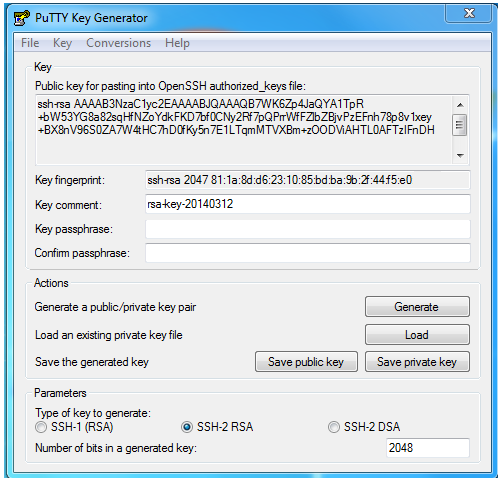
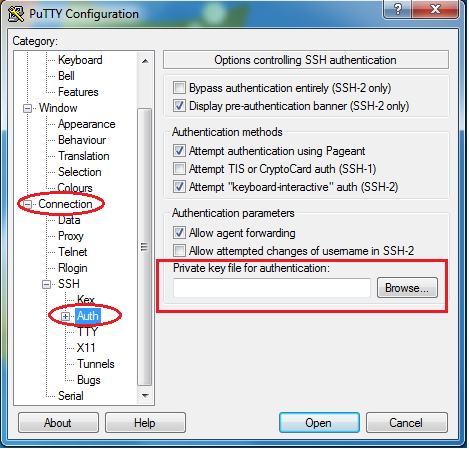
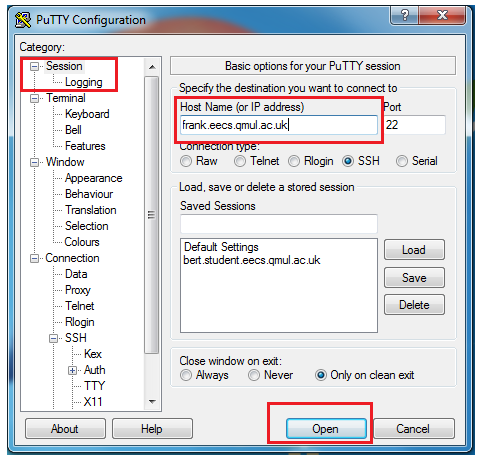
Windows
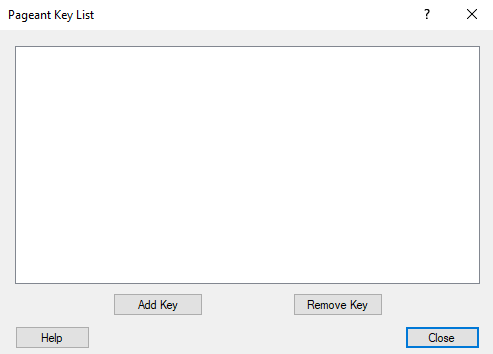
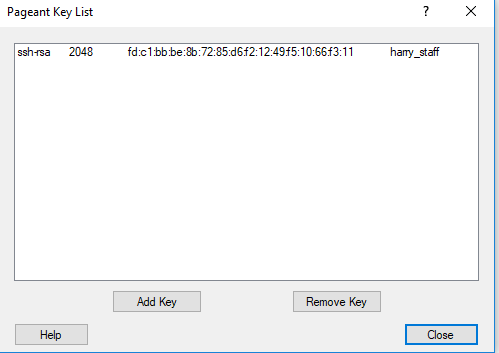
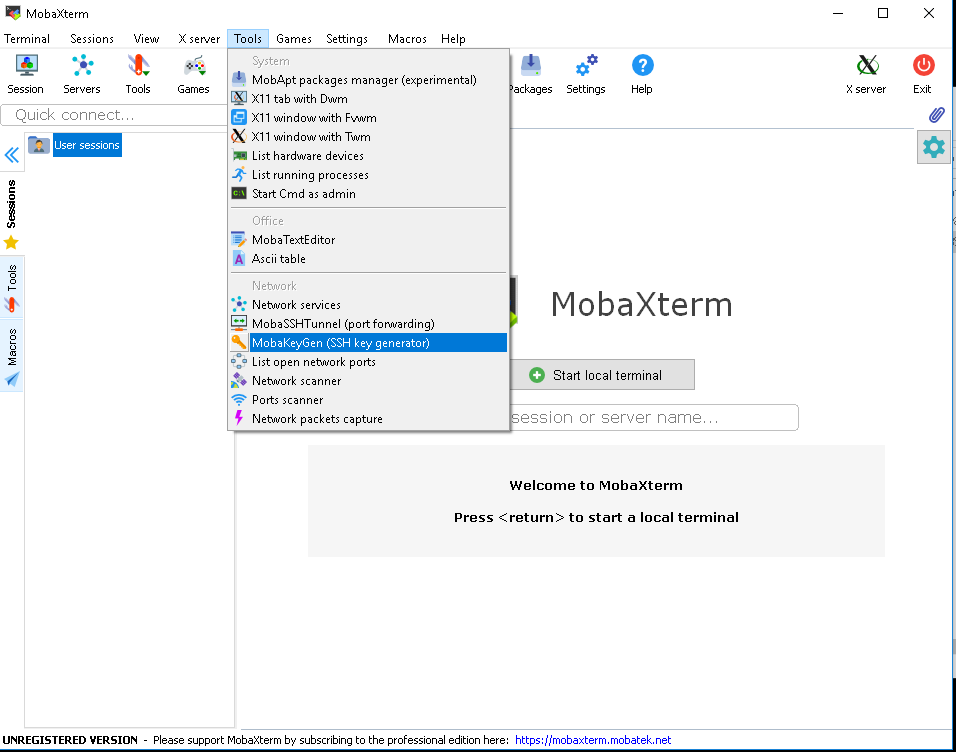
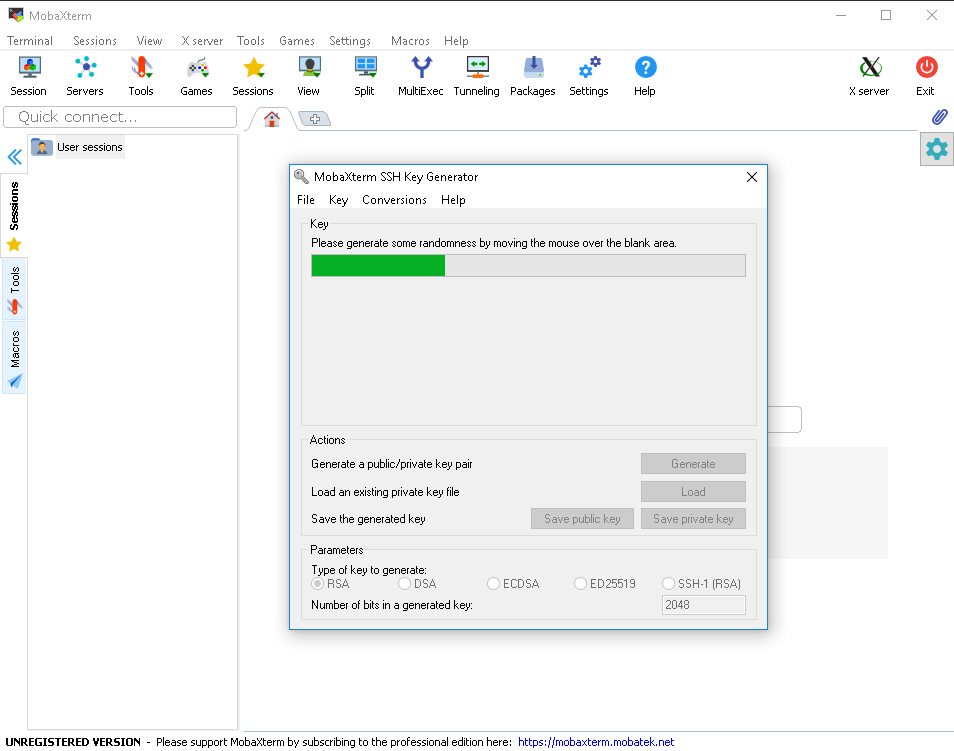
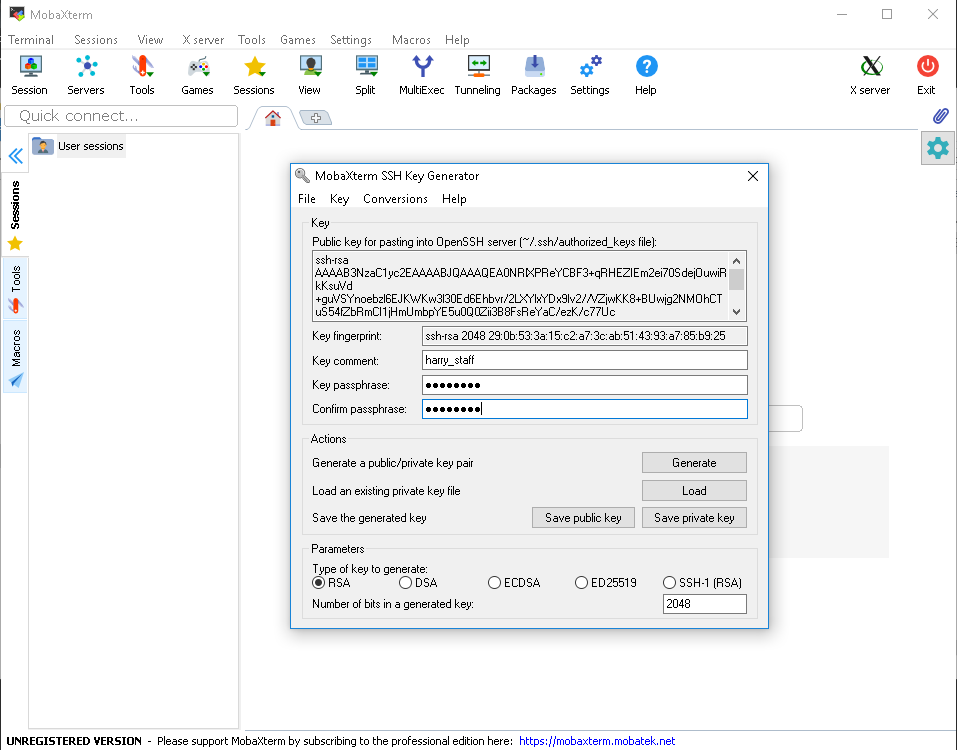
Two of the tools you can use in Windows are:

Linux
Terms
ssh-keygen : Creates the public-private key pair.
ssh-copy-id :Copies the public key into the remote server’s .ssh/authorized_keys file.
ssh-add -l : Lists the SSH-keys in the current connection
Key generation
1. Open a Terminal, type the following command and press enter:
ssh-keygen
2. Follow the instructions to generate the private/public key pair.
Press Enter at the “Enter file in which to save the key” part to create a key using the default name and path.
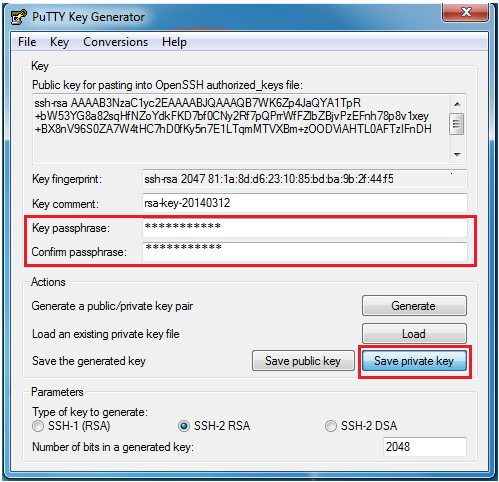
NOTE: Add a passphrase for security reasons.
$ ssh-keygen
Generating public/private rsa key pair.
Enter file in which to save the key (/home/harry/.ssh/id_rsa):
Enter passphrase (empty for no passphrase): ***********
Enter same passphrase again: ***********
Your identification has been saved in /home/harry/.ssh/id_rsa.
Your public key has been saved in /home/harry/.ssh/id_rsa.pub.
The key fingerprint is:
SHA256:dFLmbsDRF7c6accolFOxILVyyxPTCGshT55Uwn54FS8 harry@local-desktop
The key's randomart image is:
+---[RSA 2048]----+
|      ..O+* =+.  |
|       B.%.Bo+ . |
|       .%.%oE o  |
|       ooXo= *   |
|        SoB * o  |
|         . + o   |
|                 |
|                 |
|                 |
+----[SHA256]-----+
From that message you understand that your SSH key pair has been generated:
Private key : /homes/USERNAME/.ssh/id_rsa
Public key: /homes/USERNAME/.ssh/id_rsa.pub
4. Copy public key
Provided you have a QMUL IT account you can add your keys at https://support.eecs.qmul.ac.uk/ssh, if you do not please contact servicedesk@qmul.ac.uk with your public key for the EECS cluster and we will get back to you as quickly as possible.
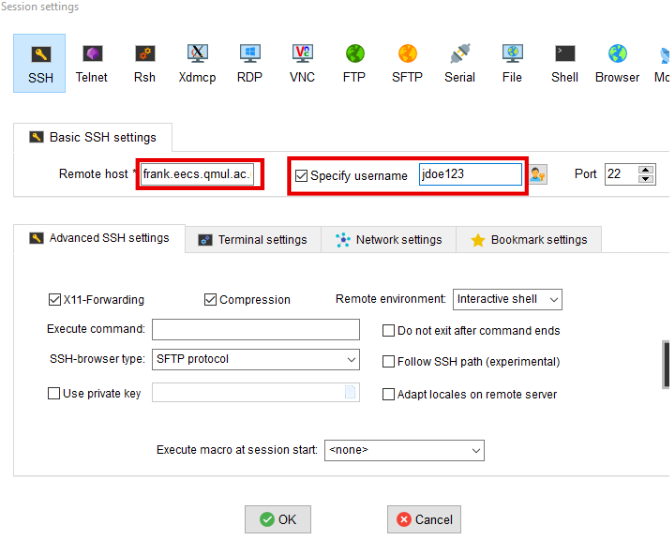
SSH access
SSH into the server with your keys to make sure it works. If you used a passphrase for your SSH keys, then you’ll be prompted to enter that.
$ ssh -i ~/.ssh/id_rsa EECS_USERNAME@LOGIN_SERVER
jdoe123 wants to copy the public key to the server frank.eecs.qmul.ac.uk, he will use:
$ ssh -i ~/.ssh/id_rsa jdoe123@frank.eecs.qmul.ac.uk
The instructions for MacOS are the same with Linux to generate and copy the SSH keys, so please follow the Linux guide.
2018-NOTE: We’ve noticed a BUG in ‘High Sierra‘ and later, where the ssh key is not being forwarded properly. The solution to that is :
- Manually add your Private key
- Confirm it’s loaded
- SSH into the remote server and check that your SSH key has been forwarded, like:
$ ssh-add ~/.ssh/id_rsa
$ ssh-add -L
$ ssh jdoe123@frank.eecs.qmul.ac.uk -A

[jdo123@frank] $ ssh-add -L
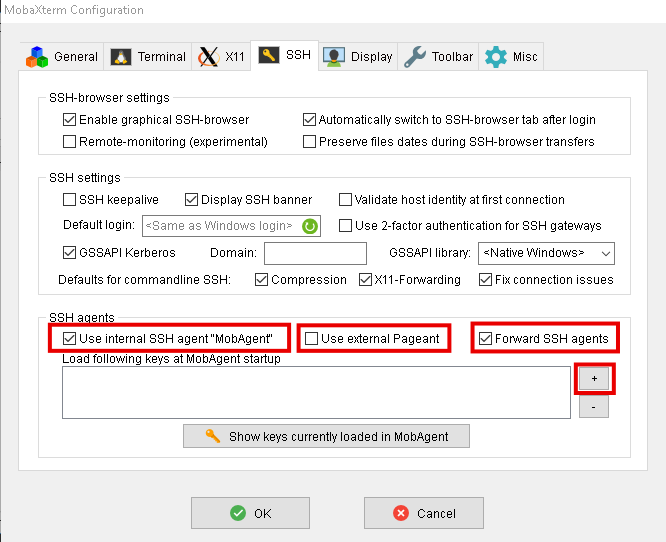
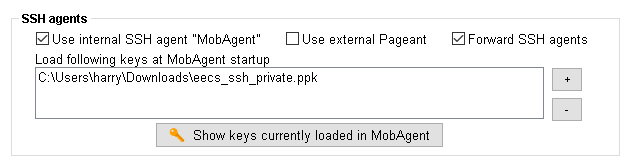
SSH Agent Forwarding
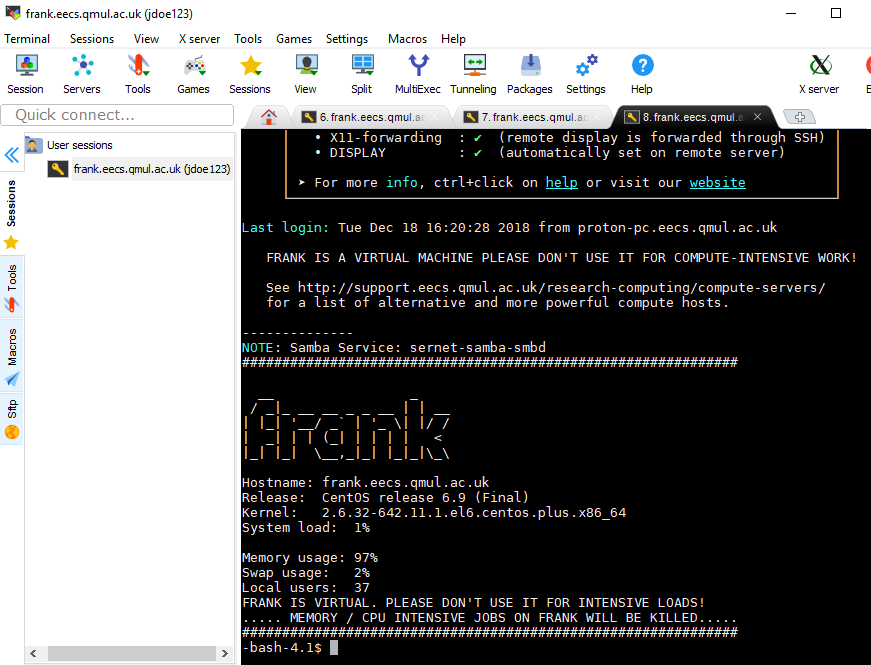
NOTE: If you try to access an EECS Compute Server via a login-server, you must enable your SSH agent forwarding. To do that on a terminal, append the ‘-A‘ flag at the end of the ssh command, for example:
$ ssh -i ~/.ssh/id_rsa jdoe123@frank.eecs.qmul.ac.uk -A
To confirm that your key is present when you SSH into the login server, type:
[jdoe123@frank] $ ssh-add -L
If your agent forwarding worked fine, the result will be the content of the Public key being used to authenticate against your Public key, for example:
[jdoe123@frank] $ ssh-add -L
ssh-rsa AAAAB3NzaC1yc2EAAAADAQABAAABAQDYSaRizDUt87d8gh8sg78DGHGDGHd8hs87h8hd8sGnAHmYSLrnR4+4DxQH7agZXzgkb4ShlBbB5TfDDhYJMYBMPvjNW7HC8cgycfduNNz0sV1WbQ1GZ5phRw34THM8E6MPnhL/DbqQMe6DOA9+yegsgAQYHo9wE35BSa6hx6UmymuM+nn2M98CrJ /home/jdoe123/.ssh/id_rsa
If you see anything else like a ‘The agent has no identities.’ message, that means you did sth wrong, so read the previous instructions again, step by step.
Add ssh keys to server
Provided you have a QMUL IT account you can add your keys at https://support.eecs.qmul.ac.uk/ssh, if you do not please contact servicedesk@qmul.ac.uk with your public key for the EECS cluster and we will get back to you as quickly as possible.